Environmental parameters such as temperature, atmospheric pressure, and air humidity are undoubtedly the most frequently measured quantities. Every year, a mass of home weather stations is created around the world, decorating the areas around the windows of our houses and
apartments.
Just like with the LCD display, I will check how much time it takes the MCU to handle these popular sensors. As a base for the library supporting these chips, I used Bosch and Adafruit libraries for Arduino available on the internet.
However, I will be working with popular Chinese modules. They are very cheap and have the necessary resistors on board. Some of them can also be powered from 5 V thanks to the onboard regulator. Remember, however, that communication is still in the 3.3 V domain, although it still works on Arduino. My test platform will be the Nucleo64-F401RE, and I will check operation times for I²C bus clocking at 100 kHz and 400 kHz. Let’s get to it!
BMP180
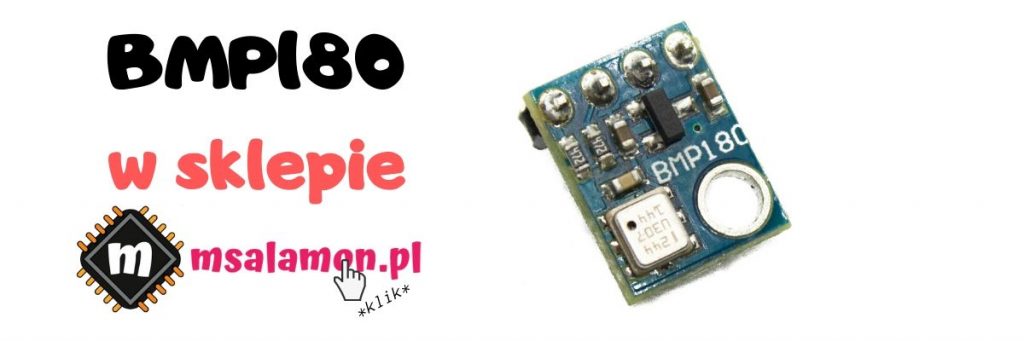
A patient measuring 3.6 x 3.8 x 0.93 mm is capable of measuring temperature and atmospheric pressure.
We read the temperature at 16-bit resolution, but it is not given directly. It must be calculated according to the algorithm shown in the datasheet. We obtain the result with a resolution of 0.1 °C, with the sensor’s measurement accuracy being ±0.5 °C at room temperature, and ±1 °C over the full measurement range (0÷65 °C).
The information about the measured pressure occupies from 16 to 19 bits and depends on the selected measurement mode, which has a significant impact on conversion time. As with temperature, the value obtained from the sensor must be calculated according to the algorithm. Only after calculation do we obtain the actual quantity we are interested in. We get the result with a precision of 0.01 hPa. The absolute accuracy of the pressure sensor is typically ±1 hPa over the entire measurement range (300÷1100 hPa). Relative accuracy is at the level of ±0.12 hPa.
In the note we also find interesting information about current consumption for 1 Hz sampling depending on the selected mode. The visible Advanced res. mode is not available just like that from, for example, initialization. For this reason I will not count it as an accuracy/consumption mode 🙂
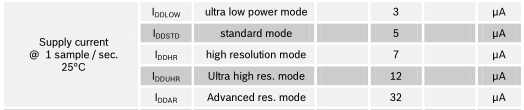
These are averaged data. The “peak” during conversion is as high as 650 µA, and in standby the sensor is satisfied with only 0.1 microamp. All these values allow the use of this type of sensor in battery-powered devices. Great 🙂
You will find the rest of the interesting information in the documentation. I encourage you to read it — it doesn’t hurt at all, and you can learn so much.
The connection diagram to the Nucleo F401RE and the STM32CubeMX configuration is simple. I will use the first I²C interface. The GY-68 module already has pull-up resistors for the I²C lines, so that’s off my plate.


First, I will check the operation of the sensor at an I²C clock speed of 100 kHz. This sensor only supports forced conversion mode, which involves waiting for the measurement to complete. While creating my library I noticed that Adafruit, for example, hard-coded the wait times for conversion completion with a plain, crude delay. Its value is the maximum declared conversion time contained in the documentation. Not nice… But ok… I checked this variant in the Standard conversion mode.
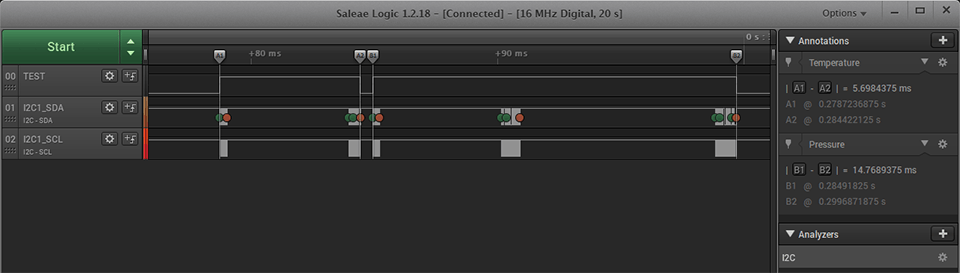
The conversion time and temperature calculation according to the algorithm is 5.69 ms. Pressure conversion takes much longer — it also includes a temperature conversion, which is needed to calculate the pressure. So why measure temperature separately? Firstly — because the sensor allows it. Secondly — maybe someday you will need temperature alone?
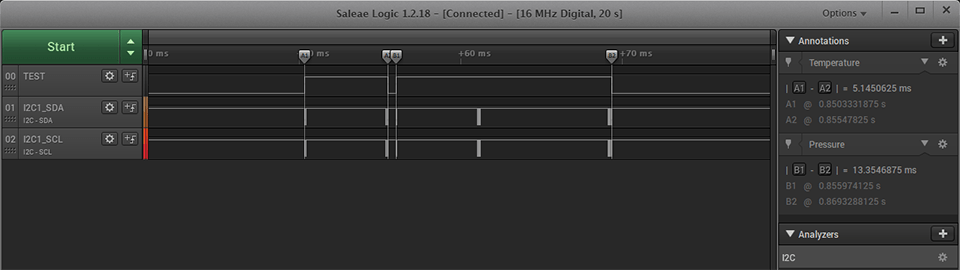
At 400 kHz I²C it looks a tad better, but I still don’t like these long, empty wait times.
Maybe it can be faster? Why insert artificial waiting here when BMP180 registers allow you to peek at the conversion status? Let’s check!
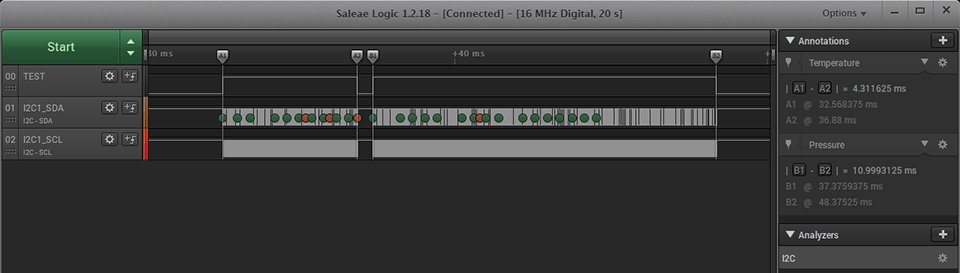
100 kHz
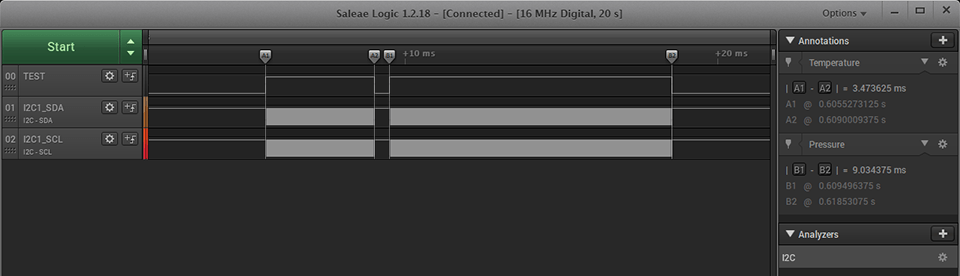
400 kHz
Better? Of course! Remember — life is too short to use delay. I ran a series of tests for all pressure conversion modes. The results are in the tables.
Temperature conversion times
| 100 kHz (delay) | 400 kHz (delay) | 100 kHz | 400 kHz | |
| All modes | 5,69 ms | 5,14 ms | 4,31 ms | 3,47 ms |
Temperature and pressure conversion times
| 100 kHz (delay) | 400 kHz (delay) | 100 kHz | 400 kHz | |
| Ultra Low Power | 11,79 ms | 10,38 ms | 9,03 ms | 7,04 ms |
| Standard | 14,76 ms | 13,35 ms | 11 ms | 9,03 ms |
| Highres | 20,72 ms | 19,26 ms | 14,94 ms | 12,9 ms |
| Ultrahighres | 32,6 ms | 31,18 ms | 22,82 ms | 20,75 ms |
I would immediately discard versions with a fixed delay. They are clearly slower than polling the sensor to see if the conversion has already finished. With infrequent reads from the sensor you generally wait for the measurement to finish, so it’s worth shortening that time by a few milliseconds. The differences between 100 kHz and 400 kHz clocking are roughly constant and are about 2 ms. This implies that the conversion time does not depend on the communication speed, but with this amount of data to transfer you can still shave off a bit. It’s worth using 400 kHz if the microcontroller and other devices on the I²C bus allow it. BMP180 supports I²C up to the high-speed standard, i.e., 3.4 Mbit/s.
Altitude a.s.l.
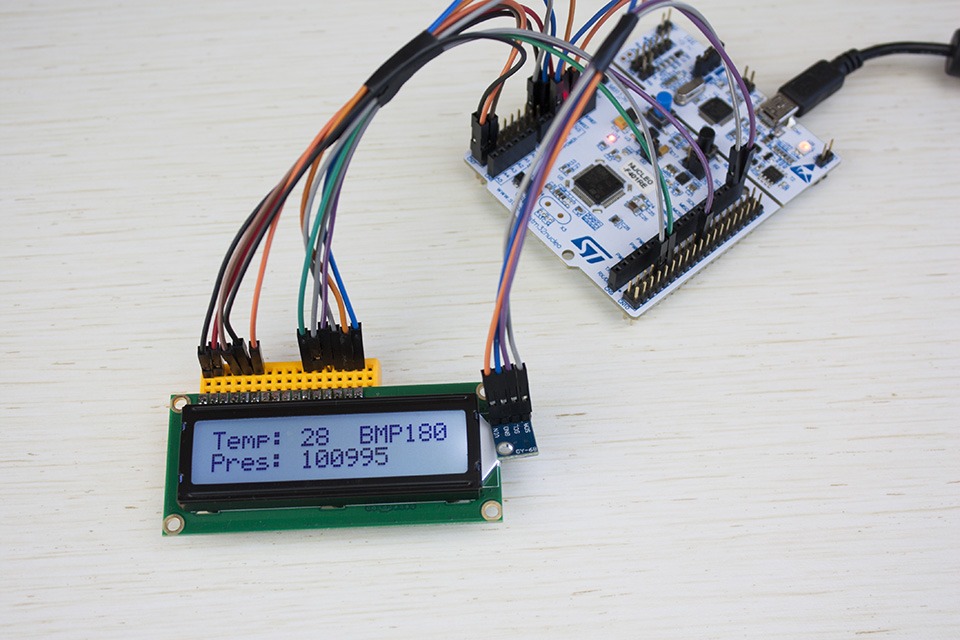
The BMP180 documentation includes an interesting feature: determining altitude above sea level based on the measured pressure.
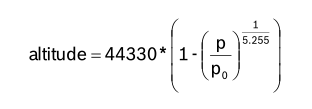
This formula requires us to provide the parameter p0 — the pressure at sea level expressed in Pa. Wikipedia defines it as 101325 Pa and that’s the value I will use. Unfortunately, the calculations are a bit off and it comes out as 29 meters below sea level, which is not true for Gdynia. I can see the sea from my window and I’m sure I am above it 🙂 Entering the current pressure given online (1018 hPa) yields 10 m a.s.l., which is closer to the truth. As you can see, without up-to-date knowledge of the pressure at sea level, we can only use these calculations as a curiosity.
I do not rule out that I don’t know how to use this function 😀 Maybe someone can enlighten me?
In the next part I take a look at the younger brother of the BMP180, i.e., the BMP280, as well as its extended version, the BME280.
If you like the sensor, you can buy it in my shop.
The complete code for this series of posts is on my GitHub: link
To wrap up this post, I encourage you to discuss handling the BMP180 sensor on STM32 in the comments. Do you think I made a mistake somewhere? Do you have an interesting idea for what could be improved? Share it in a comment! Remember that the discussion should be polite and in accordance with the rules of the Polish language.
Podobne artykuły






0 Comments