This time we’ll be like the titular Chuck Norris because we’ll be measuring the temperature of objects without touching them at all. The distance temperature sensor MLX90614 will help us with that.
MLX90614 Pyrometer
This is a pyrometer, i.e., a sensor that measures temperature based on the thermal radiation emitted by an object. Every object emits such radiation. It is perceptible to humans (you feel heat as you approach a hot object). Above all, this radiation is emitted most strongly in the infrared range. This means it is not visible to the human eye (I wrote a bit about the spectrum of visible light here). Of course, there are exceptions – bodies heated above 600ºC can emit waves short enough to fall within the visible range, specifically red. That’s why highly heated metal glows red.
The pyrometer’s task is to analyze this radiation and, based on it, determine the temperature of the object. In practice, this will be the surface temperature.
Field of View – FOV
Such sensors have one basic drawback (or maybe an advantage for some?). They have a certain fixed field of view. Hence, their measurement area depends on the distance from the object under test. This is exactly the same behavior as an ultrasonic distance sensor (Cheap ultrasonic rangefinder HC-SR04) – the farther the sensor is from the object, the larger the object should be for the measurement to be reliable.
There are several versions of the MLX90614 with different FOVs. The ranges for different types are shown in the table below from the documentation.
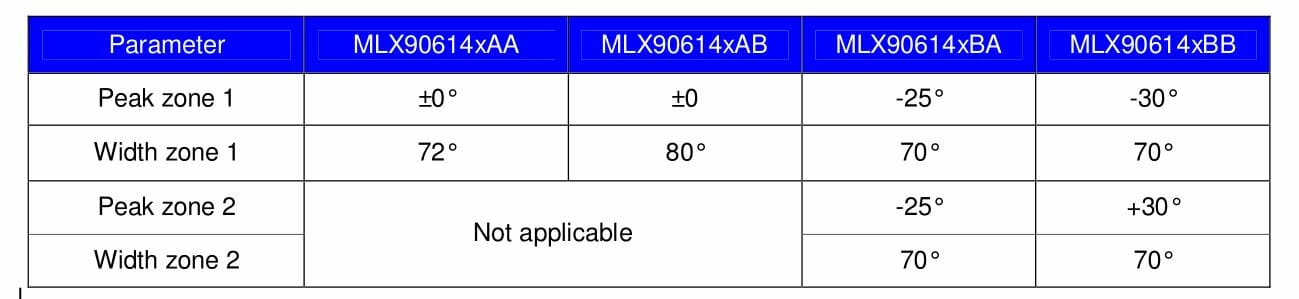
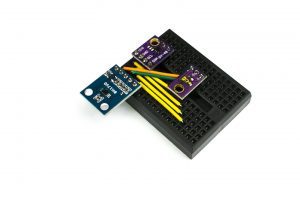
We have sensors with one and two active areas at our disposal. The module I have from China GY-906 has a MLX90614ESF-BAA mounted, so the field of view of my unit is 72º. This is a very wide angle, so remember to measure the temperature from the shortest possible distance to the object.
Some key data from the documentation (
MLX90614 Datasheet
):
- 17-bit ADC – quite a lot of bits
- Ambient temperature measurement range -40÷125ºC
- For the measured object, it sees temperature in the range -70÷382.2ºC
Emissivity
Unfortunately, as is often the case with physics – it’s complicated. Contactless measurement is tempting and may look easy, but there’s a catch. It’s the emissivity of the object under test. This is a parameter that describes a surface’s ability to emit thermal radiation. In plain terms – some materials emit thermal radiation better, others worse. Unfortunately, this should be taken into account in measurements. This value ranges from 0 to 1, and the obtained result should be multiplied by this value. Fortunately, we don’t have to do this ourselves because the MLX90614 can calculate the temperature on its own based on the given emissivity.
Every new sensor has this parameter set to 1. It is stored in the sensor’s EEPROM and can of course be changed. But how do we know what to change it to? For example, human skin has an emissivity of 0.985, while polished aluminum only 0.05. And what about all the other surfaces in the world? There are emissivity tables from which you can take these values. You can download an example here:
IR Emissivity Table
.
Communication
There are two ways to extract temperature data from the MLX90614. The first interface is SMBus, a derivative of I²C. The second is a PWM signal which, to be honest, I’ve rarely seen used, so I didn’t implement it as I did in the case of SDS011. In addition, after reset the default interface is SMBus, so why complicate life.
How does this SMBus differ from regular I²C? For us, the most important difference will be PEC, i.e., Packet Error Checking. It is used to check the correctness of data flow and in this case will be used only when writing to the sensor’s EEPROM. It’s a standard CRC-8 checksum calculated based on the device address, the address of the register we’re writing to, and the value that is being written. Is that a problem? No. You can solve it in two ways. STM32s have built-in SMBus support, and by selecting it in CubeMX you don’t have to worry about PEC. The second way is to calculate and append the CRC to the transmitted data.
In my implementation I used plain I²C. Why? It may happen that there will be several different devices on one interface and not every one will want PEC. You could toggle the bit responsible for PEC transfer in the I²C configuration registers, but I can’t guarantee that every STM32 has this bit in the same place. I also cared about portability between MCU families. Alright… but that costs time and flash and everything! Calculating CRC may take a moment, but how often will you write something to the sensor? Not much. Flash? There’s plenty in STMs.
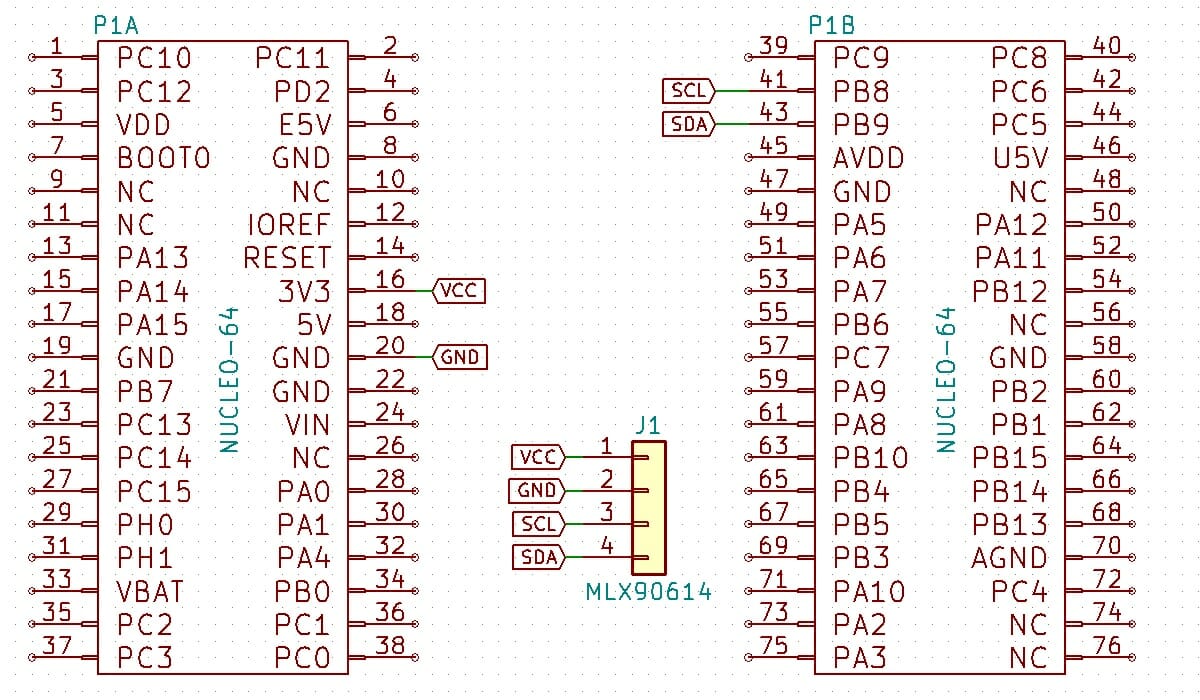
Schematic and CubeMX configuration
Today I used a Nucleo with an L053R8 microcontroller.
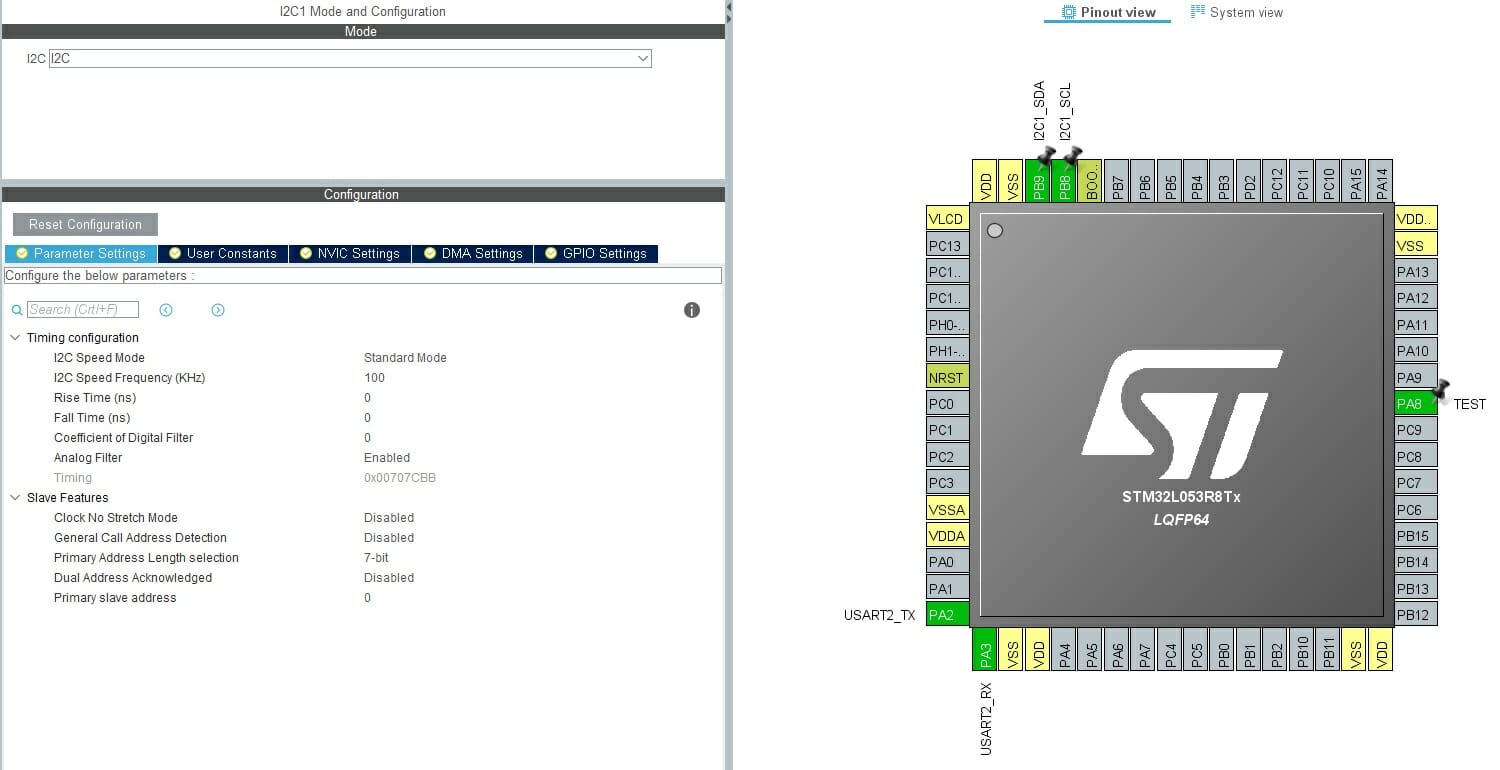
MLX90614 supports up to 100 kHz on the I²C bus, so we won’t go wild 🙁
Library
The sensor isn’t very complex, so it doesn’t require a huge library. Traditionally, the first function is initialization. In this case, the sensor is ready to read as soon as it’s powered, so this function only assigns a pointer to the I²C interface.
MLX90614_STATUS MLX90614_Init(I2C_HandleTypeDef *hi2c);
The pyrometer allows you to read two temperatures – ambient and the observed object. You can read the sensors using the functions below.
MLX90614_STATUS MLX90614_ReadObjectTemperature(float *Temperature);
MLX90614_STATUS MLX90614_ReadAmbientTemperature(float *Temperature);
Two functions are enough to handle emissivity.
MLX90614_STATUS MLX90614_GetEmissivity(float *Emissivity);
MLX90614_STATUS MLX90614_SetEmissivity(float Emissivity);
I mentioned earlier that you can change the sensor’s SMBus address. Remember that the library assumes only one sensor connected to the MCU and the address is set to the default by #define MLX90614_DEFAULT_ADDRESS ((0x5A)<<1). If you want to change the address, you must recompile the library with the new address. If you want to connect more sensors (max 127), you will need to modify the library.
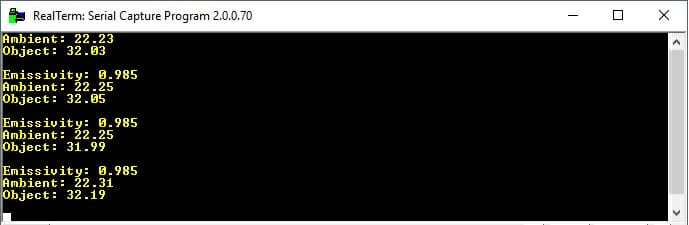
MLX90614 operation
The sensor starts measuring immediately after power-up. If you don’t want to change the emissivity parameter, it’s enough to read the temperature cyclically. In the test code I read two temperatures and the set emissivity. As you can see on the terminal screenshot – I set the emissivity to that of human skin, and the surface temperature of my thumb is just over 32ºC 🙂
Now for what tigers (or at least one – me) like best – timings. Most often you’ll be reading the temperature. It doesn’t matter whether it’s for the ambient or the object. For both it’s exactly the same procedure. The time to read and compute the temperature is only 600 μs, which is very little.

Can you use DMA? Of course. Just note that you need to do a small conversion to get the temperature in Celsius.
Summary
That’s it as far as this interesting chip is concerned. A pyrometer can be used wherever there is no possibility to interfere with the measured object. I myself will soon want to build a device based on this sensor. What do you say to doing it live? Let me know in the comments or by email.
If you liked the sensor, you can buy it in my store.
The project with code is on my GitHub: link
If you noticed any error, disagree with something, would like to add something important, or simply think you’d like to discuss this topic, write a comment. Remember that the discussion should be polite and in accordance with the rules of the Polish language.
Podobne artykuły


0 Comments