In the previous post in the dual-core series, I showed you a really strong contender, namely the STM32H745, which is on the Nucleo 144-size board. I got to the point where I created the first project. We already have the project structure behind us. So how do we run our code now?
The “main” core – MCU start
Who rules in the STM32H745 package? It seems like the stronger one, i.e., Cortex-M7. You might think that Cortex-M7 in such a case will initialize the whole microcontroller. And that is exactly the default behavior.
Cube generates the project in Boot Mode Sequence 1. What is this sequence about? I summarized the whole thing in a table.
| Cortex-M4 | Cortex-M7 |
| Start | Start |
| Enables semaphores and activates notifications on HSEM_ID_0 | Waits until Cortex-M4 enters STOP Mode |
| Clears Events and enters STOP Mode | |
| Initializes HAL |
| Configures clocks (shared for both cores) | |
| Takes semaphore HSEM_ID_0 | |
| Releases semaphore HSEM_ID_0 (sending a notification to Cortex-M4 to wake it up) | |
| Waits for Cortex-M4 to wake up | |
| Wakes up after the semaphore notification |
| Initializes HAL | Initializes its peripherals |
| Initializes its peripherals | Runs |
| Runs |
After this startup sequence, both cores are already working. Each according to its own program, because after all we write two separate programs, if you remember from the previous post.
A simple LED blinking program
What’s the first thing you can do on a microcontroller that’s new to you? Of course—blink an LED! On the NUCLEO-H745ZI-Q we have as many as three LEDs compared to the smaller Nucleo. Green, yellow, and red.

On one core we’ll blink the green one, on the other the red one. We’ll do both blinks using HAL_Delay, so we’ll finally be able to run “two things at once” 😉
The code is trivially simple. In main.c for Cortex-M4, in the main loop you just blink the LED.
  /* Infinite loop */
  /* USER CODE BEGIN WHILE */
  while (1)
  {
	  HAL_GPIO_TogglePin(LD1_GPIO_Port, LD1_Pin);
	  HAL_Delay(500);
    /* USER CODE END WHILE */

    /* USER CODE BEGIN 3 */
  }
  /* USER CODE END 3 */
On the second core, Cortex-M7, we write in a different main.c, but the code will look almost the same. It differs in the LED number and the blink speed.
  /* Infinite loop */
  /* USER CODE BEGIN WHILE */
  while (1)
  {
	  HAL_GPIO_TogglePin(LD3_GPIO_Port, LD3_Pin);
	  HAL_Delay(300);
    /* USER CODE END WHILE */

    /* USER CODE BEGIN 3 */
  }
  /* USER CODE END 3 */
That’s it for the code. The real difficulties start only now—now that we want to run it on the microcontroller as a debug session, to inspect the operation of the whole system.
Starting Debug on the STM32H745
You can find the entire startup sequence in the appropriate ST document. It contains information on how to get started with dual-core in STM32CubeIDE. Let me present you the most important part, namely how to start debugging.
In short:
- We need a separate debug project for each core
- You have to set the configuration so that the cores halt each other
- Create a group of debug configurations to run them simultaneously.
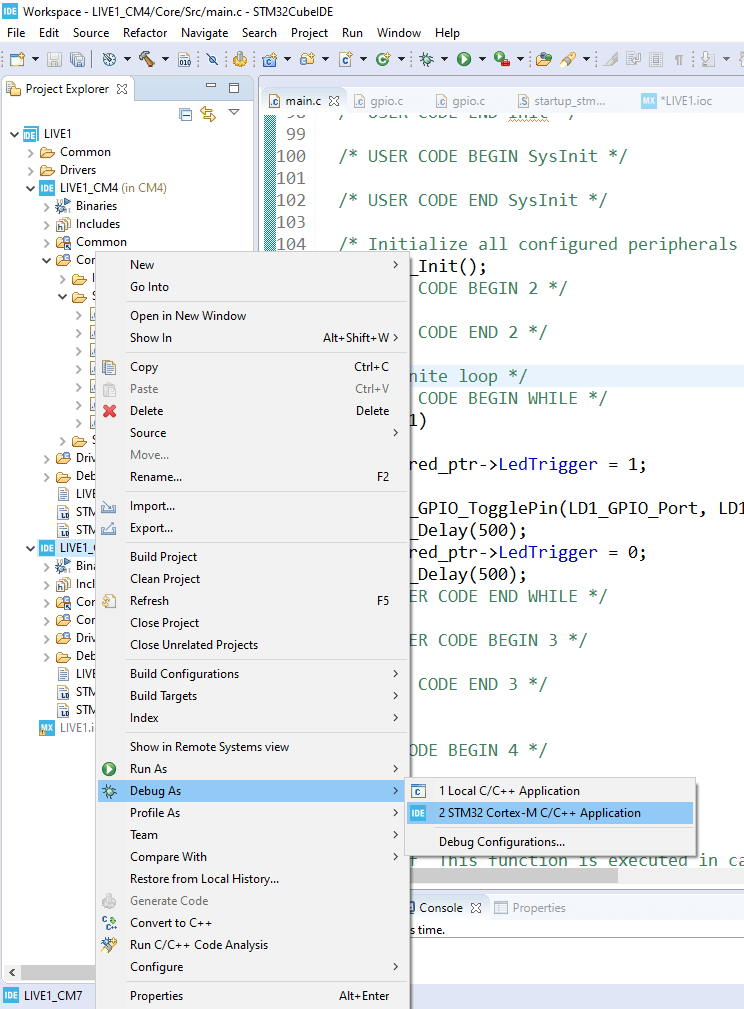
What does it look like in practice? Let me show you.
Let’s start with Cortex-M7. Let’s create a debug configuration for it.
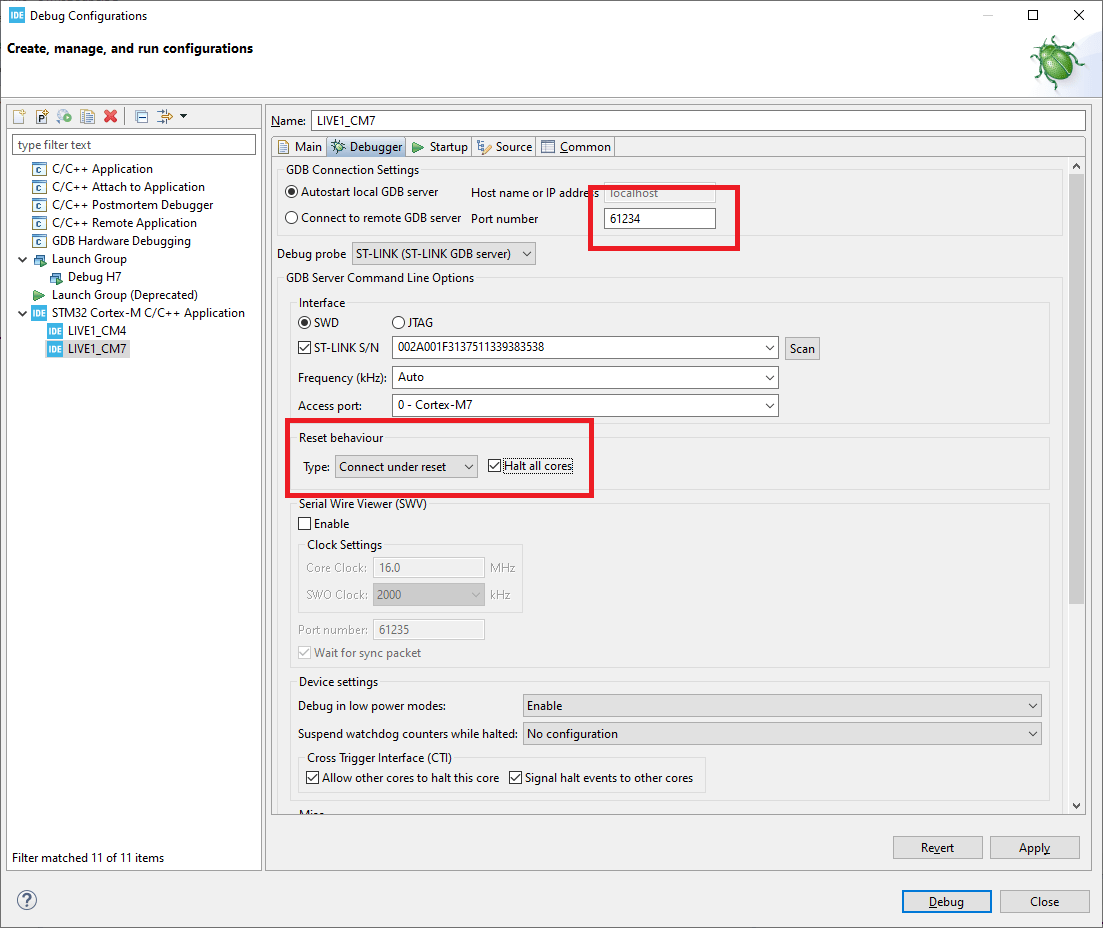
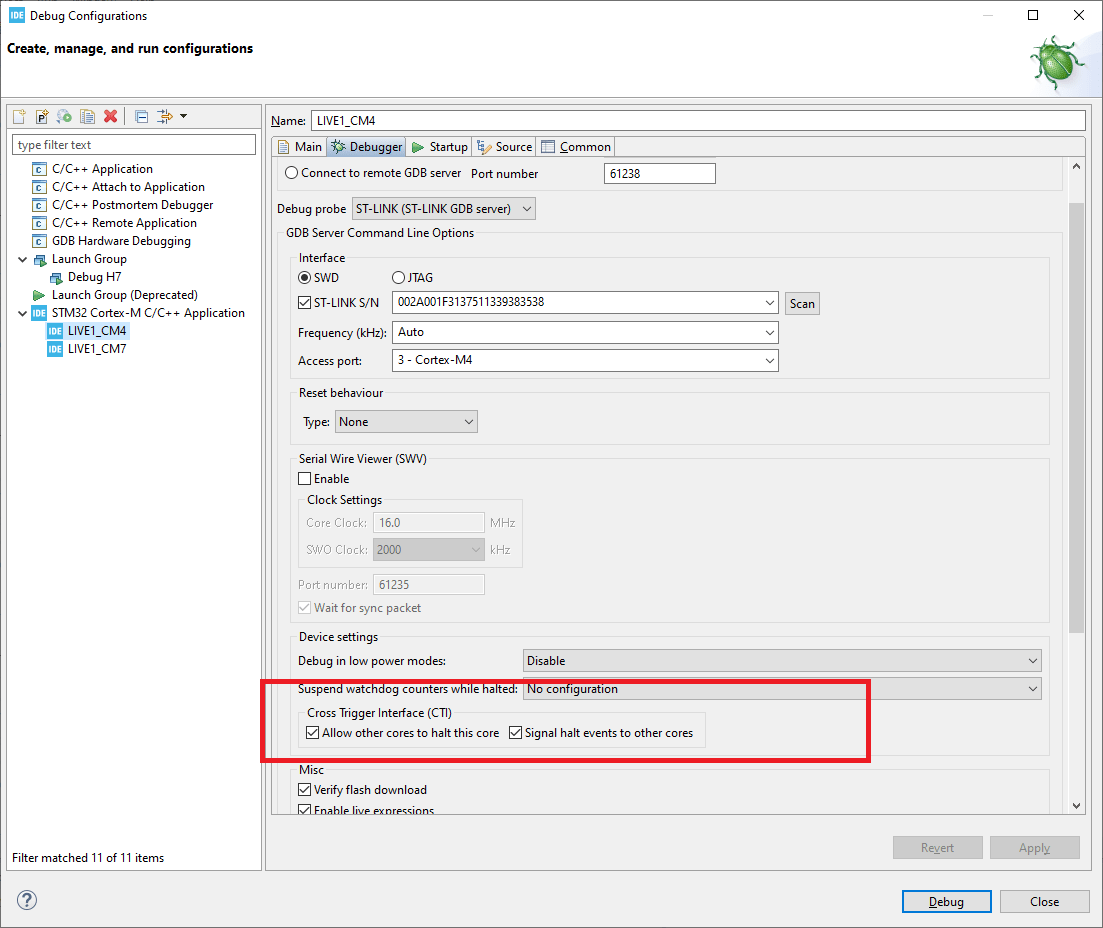
Next, set “Connect under reset” and check Halt all cores. Pay attention to the port number for GDB.
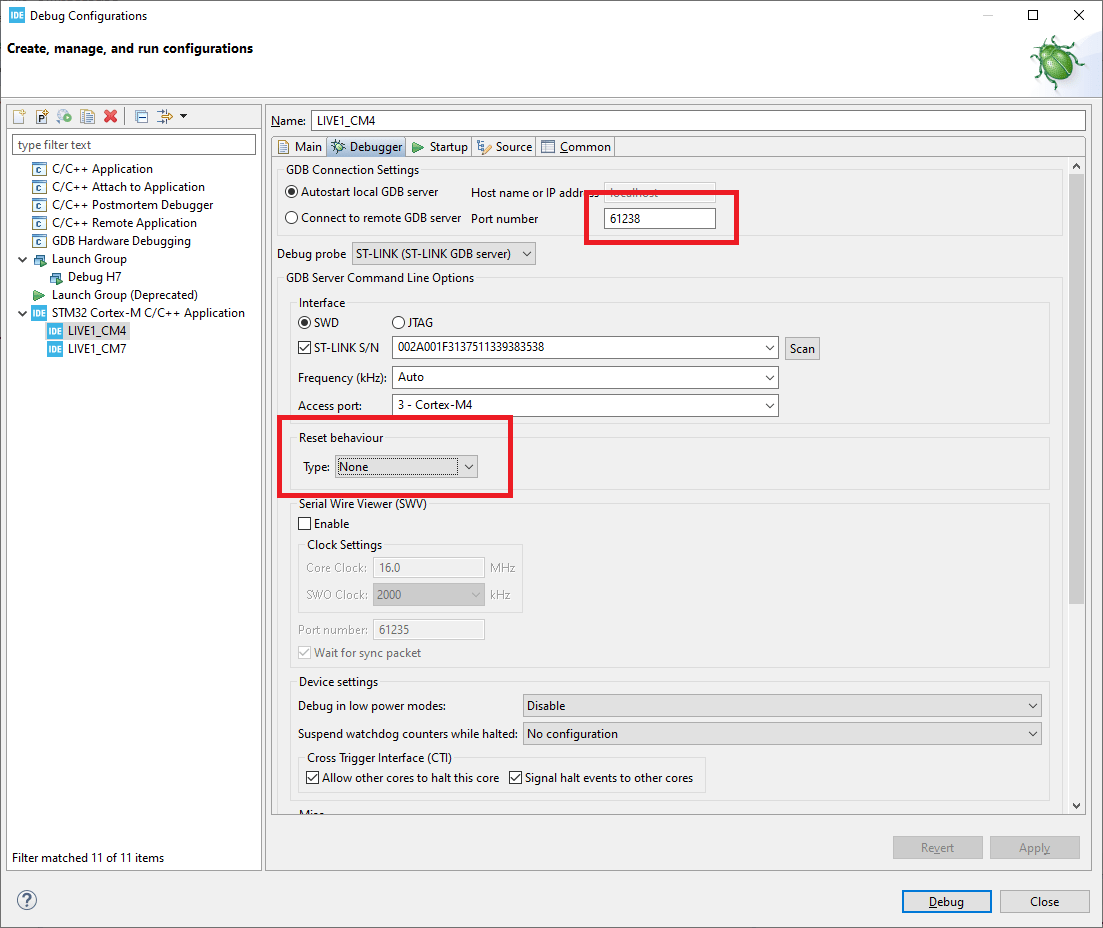
Create a debug project like that for Cortex-M4 as well. Here, do not set reset, but instead set a different GDB port number than for Cortex-M7. Otherwise it won’t work!
Since we’re still in the Debugger tab, in both configurations you must check both options in the Cross Trigger Interface. This makes it possible for one core to halt the other and vice versa.
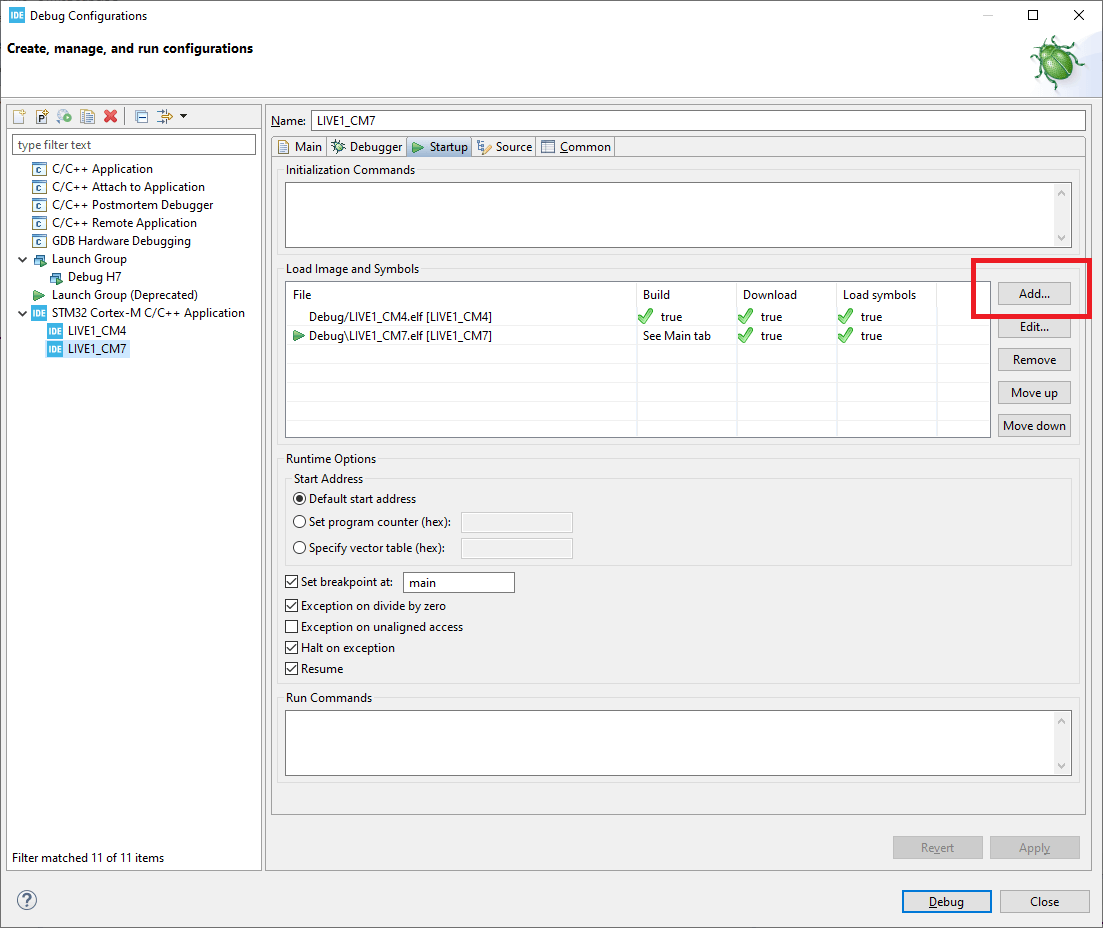
OK. Now go back to the Cortex-M7 configuration. In the Startup tab you now need to add the *.elf file from Cortex-M4. You do this via Add…
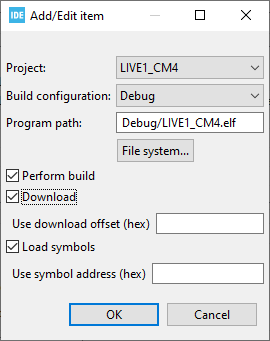
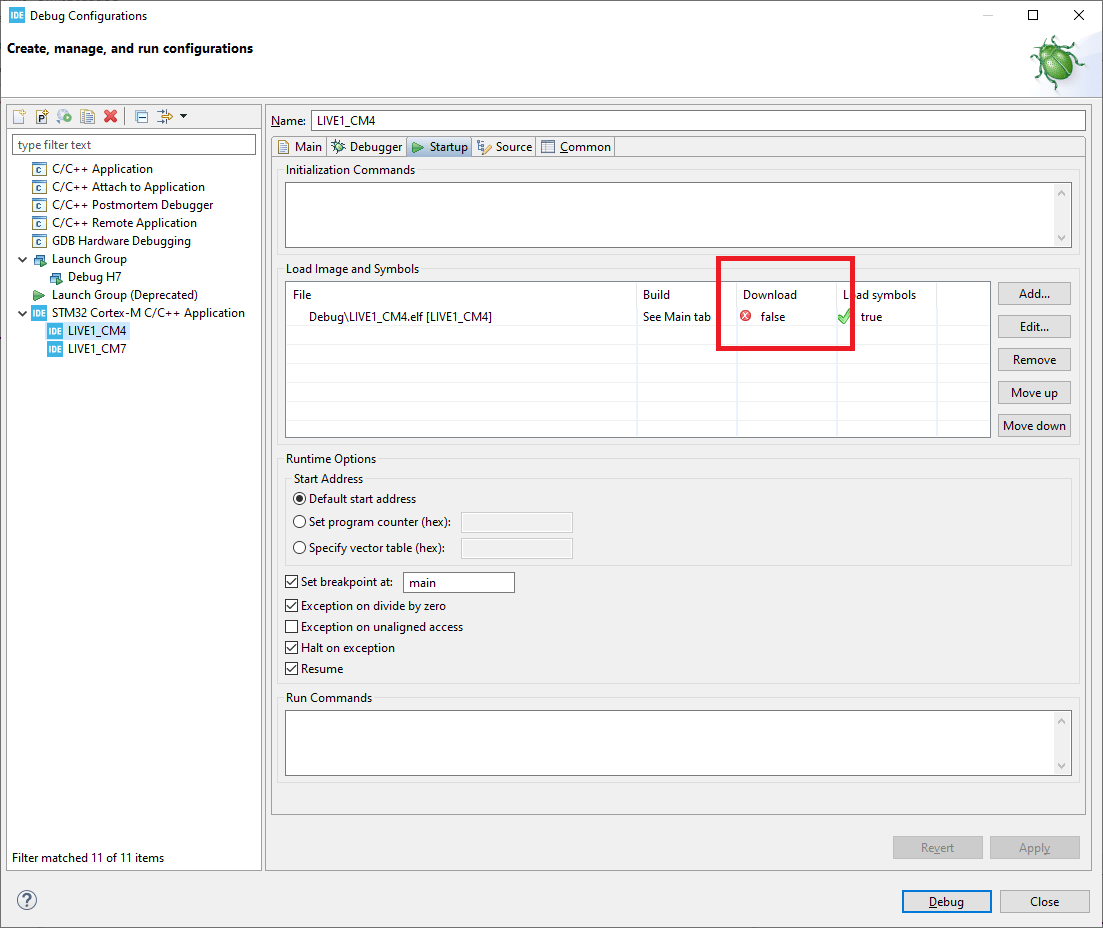
And configure this ELF as below. You have to select which project you want to add to Startup. Notice that I checked the “Download” checkbox. This means the Cortex-M7 configuration will also program the microcontroller with the code for Cortex-M4. This means the Cortex-M4 configuration can no longer do that. You have to uncheck the Download checkbox there.
Now we need to run it. We have to create a so-called Launch group in debug, which will start two configurations at the same time.
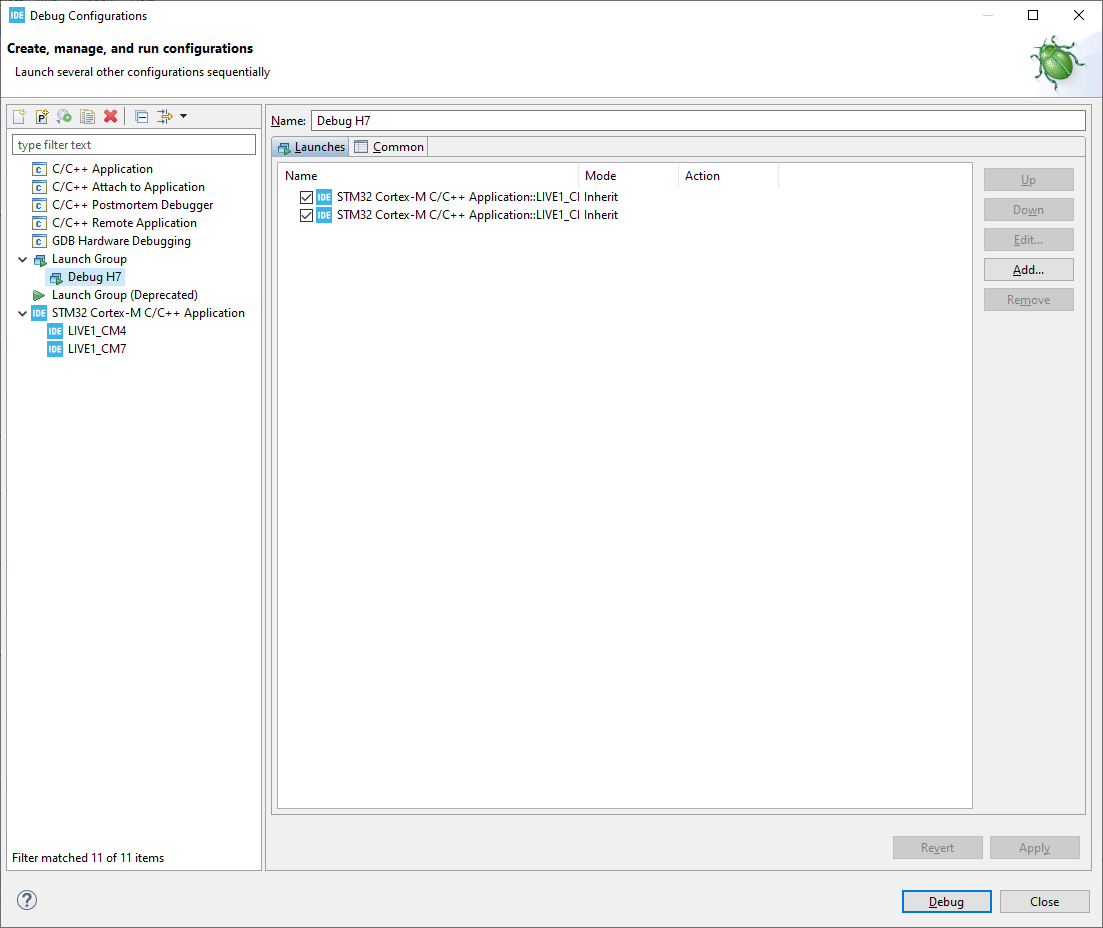
The configuration is ready. Now you just need to launch it! It’s not that simple either 🙂
Running the program
You can’t just press Play in Debug and watch it run. You have two projects and you have to start them separately in both. Additionally, you need to do it in the right sequence so that the cores cooperate with each other!
Step by step:
- Start the group project
- Start the Cortex-M4 project – it will end up at address 0xA05F0000, which means it entered STOP Mode and the debug has stopped.
- Start Cortex-M7.
- Resume Cortex-M4.
- Both cores are running.
If you loaded a simple LED blink on each core, you will observe two LEDs blinking on the Nucleo 🙂 Each of them is controlled by a different microcontroller core.
Summary
As you can see, there’s some gymnastics involved in running a program on such a 2-core device. However, it can be done fairly easily if we stick to a few rules. Later you only need to remember in what order to start the programs on the microcontroller, and that’s it.
You’re probably wondering how to communicate between the two cores, right? After all, they didn’t put them into one package so they could run separately.
STM32H745 has several possibilities when it comes to such cooperation of the two “eggs”. I will cover this in future posts.
If you liked the article, buy something from me!  https://sklep.msalamon.pl/
If you noticed an error, disagree with something, would like to add something important, or simply feel like you’d like to discuss this topic, write a comment. Remember that the discussion should be polite and in accordance with the rules of the Polish language.
Podobne artykuły


0 Comments