If we think about debugging, what comes to mind? Breakpoints, stepping through code, but above all printing. When dealing with microcontrollers, most often we send messages to the serial console terminal on the PC. We use one of the UART interfaces for this. What if we don’t have that UART? There’s one clever mechanism. It’s called Semihosting.
What is Semihosting on STM32?
It is one of the available debugging methods for programs on a microcontroller. The mechanisms used for this are built into the ARM cores. So semihosting is available not only on STM32.
The idea is to replace standard input and output on the microcontroller. In our systems we have neither a screen with a console nor a keyboard. However, that doesn’t mean we can’t use them.
Semihosting allows you to use your computer’s resources as standard input and output for the microcontroller. What resources? The console and the keyboard.
All of this happens thanks to special instructions in the microcontroller that trigger system exceptions (e.g., the SVC instruction – SuperVisor Call). Such an exception is intercepted by appropriate functions and the hardware debugger. It can now redirect data from the microcontroller straight to our computer and vice versa.
On the PC side, this is received by the software that started debugging the code on the microcontroller. It provides the console and keyboard for use precisely through this “tunnel”.
Required microcontroller pins
Now the best part. Which microcontroller pins are used for such communication?
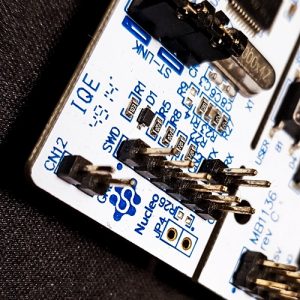
Exactly the same ones as in “classic” debugging. These are SWCLK and SWDIO. Nothing more!
We don’t have to change the hardware configuration. Heck! We don’t have to “waste” a UART interface just to print something to the console for debugging purposes.
This is a huge advantage of Semihosting. UART eats 2 pins, and SWV one – SWO. If you have a constrained project where you don’t have any free pins, you already have an “interface” for printing logs from the program’s operation.
So let’s move on to configuring this Semihosting.
Test platform
As a test board I used the Discovery B-U585I-IOT02A kit. It’s a board with the newest baby from STMicroelectronics, i.e. STM32U5. I recently wrote about their capabilities.
Currently I’m using this platform on Live Streams, which I run regularly on Tuesdays at 18:00 on my YouTube (the content is in Polish).
Most important info! This method is identical for all STM32 microcontrollers (and not only them). If you have a different chip, everything will look the same.
Configuring Semihosting on STM32
Let’s get to the specifics. How do you set up Semihosting on STM32? There are a few steps.
1. The right software debugger
You need to choose the right debugger on the computer side. That will be OpenOCD.
Unfortunately, the default ST-Link GDB does not support Semihosting.
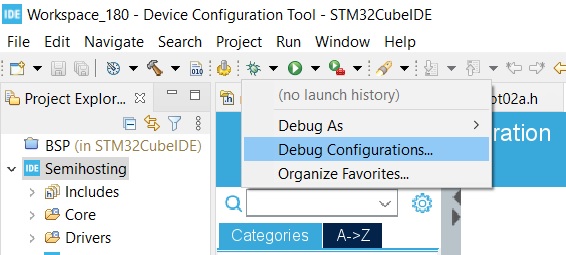
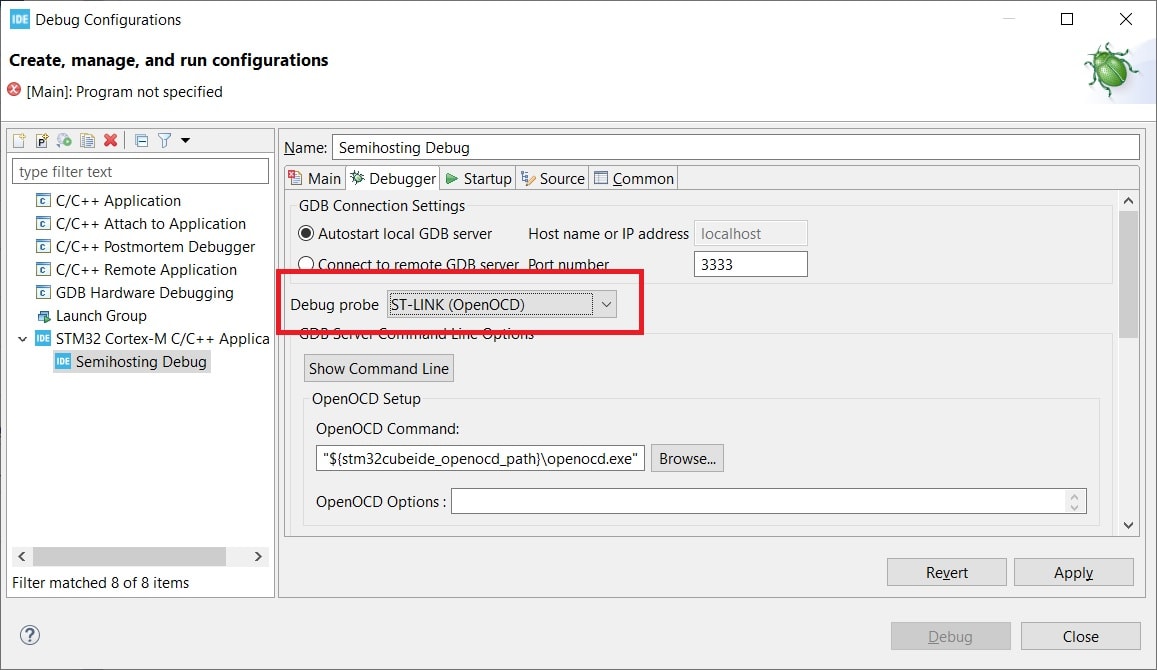
You set the debugging configuration during the first debug run. If you’ve already done it, under the bug icon you have Debug Configurations.
Now, as Debug Probe set ST-Link (OpenOCD).
2. Enabling an external library via the linker
For the program to know how to use, for example, system exceptions in order to use Semihosting, you need to include an external library. It’s a precompiled library, so you do it only at the linker stage.
If you enter parameters manually, then add to the linker options
-l rdimon --specs=rdimon.specs
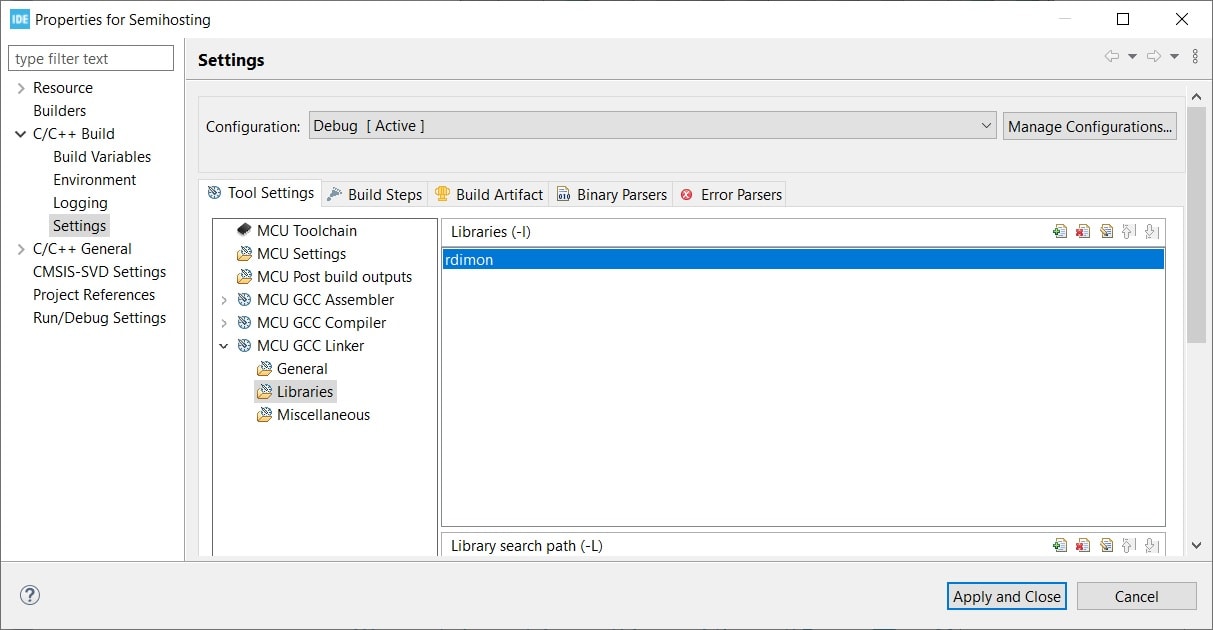
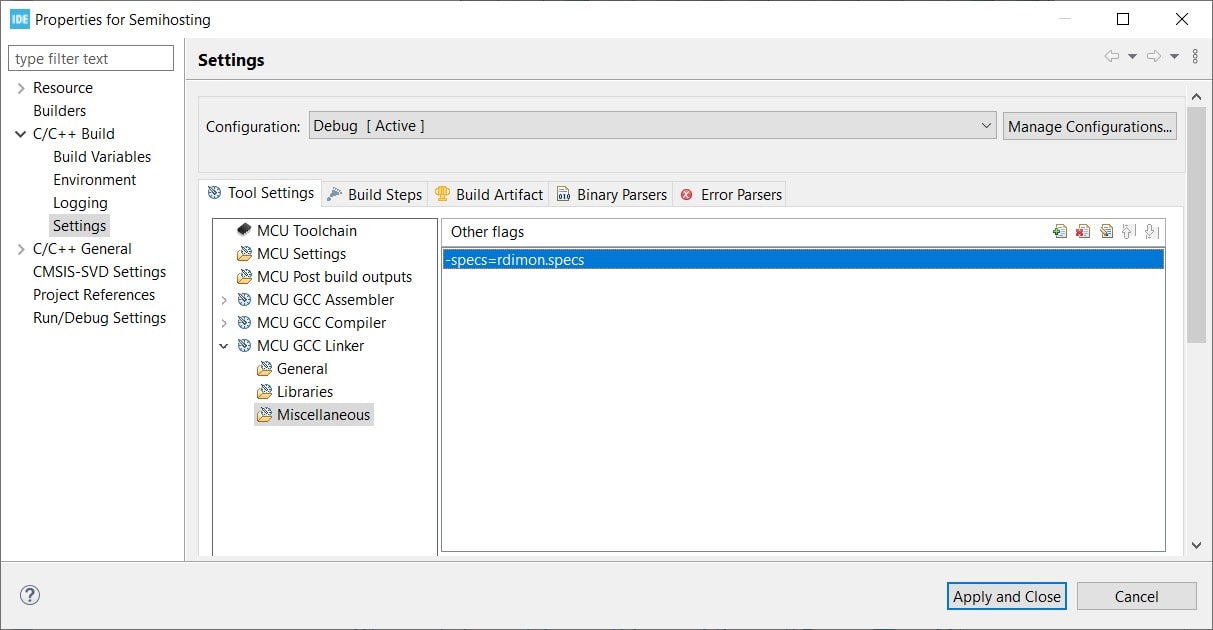
If, like me, you use STM32CubeIDE, then add it in the appropriate linker options:
Project > Properties > C/C++ Build > Settings > MCU GCC Linker
In Libraries add rdimon.
In Miscellaneous enter:
-specs=rdimon.specs
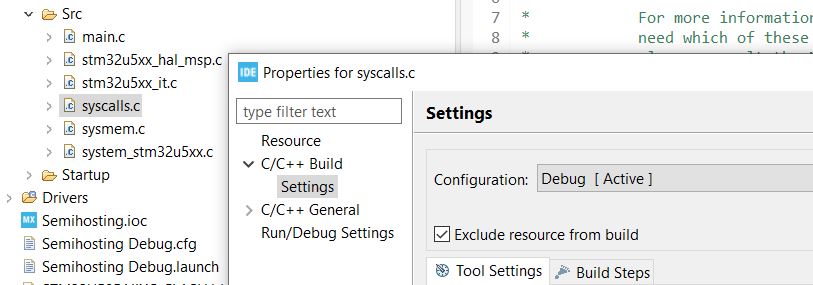
3. Excluding syscalls.c from compilation
STM32CubeMX generates a default syscalls.c file. It contains empty system call functions. They’re there for us to use if we wanted to write something ourselves, e.g. semihosting or something similar.
We most likely won’t do that ourselves. Additionally, the same functions are included externally via what we attached to the linker.
There will be a clash. That means the compiler may tell us that we have some duplicate definitions. You need to exclude this file from compilation.
You could delete it, but… it will come back after regenerating files with CubeMX. You need to exclude it completely.
Right-click on this file > Properties > check the box “Exclude resource from build”
4. Initialization in the microcontroller program
We’ve already configured everything on the microcontroller side. Now in our program it remains to call the initialization function for Semihosting—just like we initialize any interface before using it.
This is done with the function:
initialise_monitor_handles();
It’s enough to add it in main before the main loop. We can do this even before initializing HAL. Then we’ll be able to send something to the console even before the whole HAL comes up.
So that the compiler doesn’t complain that it doesn’t know it, you must add its prototype with an extern annotation (in the rdimon library) somewhere at the top of the file.
extern void initialise_monitor_handles(void);
5. Enabling semihosting when starting debugging
On the microcontroller side we’re done. Let’s finish the PC side.
Here, similarly to STM32 you need to initialize Semihosting. This is done at the moment debugging starts, i.e. when launching the OpenOCD session. You need to give it a command so it knows that we’re semihosting.
You need to go back into the debug session settings of your project. This time, what we’re interested in is in the Startup tab. There is a field “Initialization Commands”. These commands will be executed when bringing up the debug session.
Enter here:
monitor arm semihosting enable
You now have everything you need to use Semihosting!
How to use Semihosting?
We’re done with the configuration, so how do we use this mechanism?
If you don’t have it, you must include the <stdio.h> file in your project.
If you did everything the way I described, then now you simply use the printf function.
There is only one important rule. Every message sent via Semihosting must end with the ‘\n’ character.
Just as if you were printing to the console on a PC, now you print from the microcontroller. Where will these strings go? To the console from which OpenOCD was launched. If you did it in STM32CubeIDE, it’s the console at the bottom.
Example:
int main(void)
{
  /* USER CODE BEGIN 1 */
	initialise_monitor_handles();

	printf("Semihosting test\n");
  /* USER CODE END 1 */
As you can see, I inserted the Semihosting code right after entering main and immediately want to print something. What will be the effect?
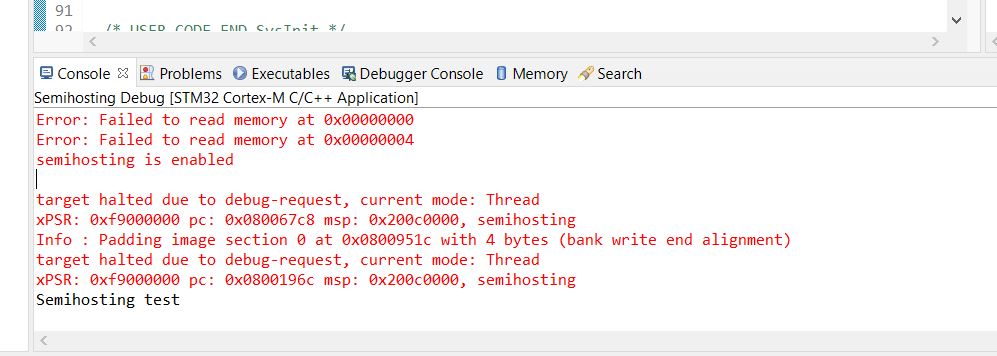
It works. My test string appeared in the console.
Note that among the red messages from OpenOCD we got “semihosting is enabled”. That means everything is fine.
I also said we can use our PC keyboard, right?
The scanf(…) function reads standard input, i.e. what we type into the console. It is a blocking function and waits for Enter from the keyboard.
By adding these lines to the program:
int main(void)
{
  /* USER CODE BEGIN 1 */
	int32_t Value;

	initialise_monitor_handles();

	printf("Semihosting test\n");

	printf("Type a integer: \n");
	scanf("%ld", &Value);
	printf("You typed %ld\n", Value);

  /* USER CODE END 1 */
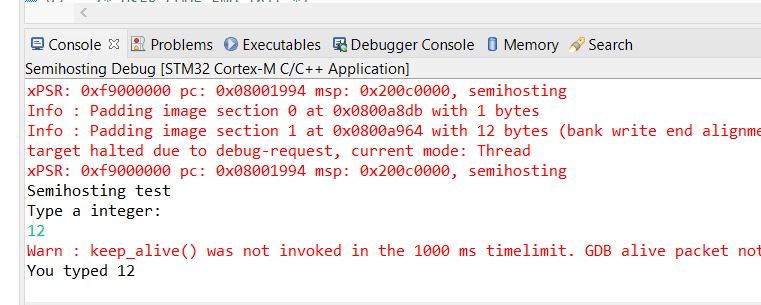
We get a program flow that requires user interaction. The program stops and waits for you to provide it with an integer in the console. Don’t forget Enter! The text we type from the keyboard has a greenish-turquoise color.
File operations
Using this approach we can not only use the console, but also files on our computer!
The following functions are used for this:
- fopen() – opens a file
- fprintf() – writes to a file
- fscanf() – reads from a file
- fclose() – closes a file
There are more functions in stdio.h, but these are the most important.
You can provide the file path relatively—then it refers to the location from which the program is run.
You can also provide it as an absolute path. You use paths from your computer. Just don’t point to drive C, because you’ll run into administrator permissions and the MCU will end up in Hard Fault 🙂
Example:
int main(void)
{
/* USER CODE BEGIN 1 */
FILE *FilePtr;
initialise_monitor_handles();
FilePtr = fopen("d:\\semi\\test.txt", "w");
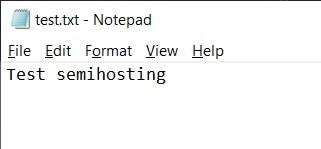
fprintf(FilePtr, "Test semihosting");
fclose(FilePtr);
/* USER CODE END 1 */
The program is supposed to open a file (create it if it doesn’t exist), write text, and close it. Always remember to close files after using them!
Running such a program with the path I provided, I got a new file 🙂
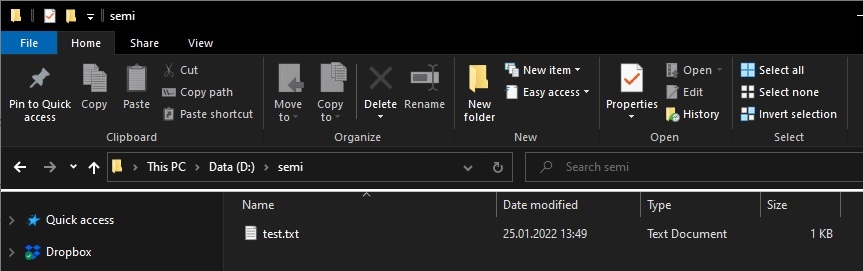
Inside, of course, was what I wrote in the microcontroller program.
I see potential here in the “other direction”, i.e. from a file on the PC to the microcontroller.
You can write some algorithm on the microcontroller, and inject test data from a file on the computer! This can have huge applications.
Summary
Semihosting is a very interesting alternative to debugging via printing. It allows us to replace UART. It makes it much easier to implement things like connecting a keyboard or pulling data from a file on the computer.
I didn’t mention anything about the downsides, and I think it has one important one. This solution is very slow. Try running printing in a loop without any delay and you’ll see that there isn’t such a storm of characters as, for example, with UART.
For this reason Semihosting won’t be suitable where high log throughput speed is required. However, these will be specific use cases. There’s no need to demonize this speed. For learning or a simple project, it may turn out that this speed is sufficient.
You can also introduce a logging level and, for example, send only more important messages or only those you currently need.
Among the advantages, I would definitely mention the minimal number of pins needed for operation. You could say it’s zero, because you always have the debugger connected anyway.
STM32 Course for Beginners
As early as February 16 the best STM32 programming course for Beginners returns! This is already the fourth edition! (the course content is in Polish)
It’s a complete A-to-Z program in which you will learn STM32 microcontroller programming. You will get to know its interfaces and you will be able to use them correctly and in a non-blocking way.
Don’t miss the chance! The next edition will probably be only in the second half of 2022.
So far, over 470 people have taken part in the course!
Sign up for the waiting list at https://kursstm32.pl/ (the content is in Polish)

Podobne artykuły


0 Comments